其实是献给自己的Hexo教程
Hexo和Github Pages
为什么选择Github Pages?
作为一个大学生,其实已经经过了很多尝试,我从初二开始接触Linux,接触服务器,反复搭过很多次自己的网站,但因为学业繁重,最后基本都不了了之…甚至最开始只会用服务器搭建,很多时候没有备份,忘记续费于是资料就全没了。而Github Pages的话,最大的优点就是完全免费!所以你有兴趣的话就继续看下去吧!
科普
- Github Pages:
GitHub Pages 是一项静态站点托管服务,它直接从 GitHub 上获取 HTML、CSS 和 JavaScript 文件,通过构建过程运行文件,然后发布网站。
你可以在 GitHub 的 github.io 域或自己的自定义域上托管站点。
可以总结为以下几点:
- Github Pages 是 Github 提供的网页寄存服务,用于存放静态网页,也就是我们的博客。
- 我们可以使用专业软件将文档转换成静态网页(如:Hexo),然后上传至 Github
- 最后的结果就像现在这样,你们可以通过我的github.io子域名访问到我生成的静态网页,即本篇博客
- Hexo:
- Hexo 是一款基于 Node.js 的快速、简洁且高效的静态博客框架。
- Hexo 使用 Markdown(或其他渲染引擎)解析文章,安装十分方便,配置简单,自定义功能强大,在几秒内,即可利用靓丽的主题生成静态网页。
- 使用起来的效果就是:我仍然可以使用 Markdown 写博客内容,然后使用部署在本地的Hexo框架进行解析,生成相应的静态网页,最后一键上传即可。
教程开始:
Step1: 创建 github 账号和username.github.io 仓库
Step2: 在本地部署环境(Linux)
- 安装:
1 | sudo pacman -S git npm nodejs |
- 部署Hexo:
1 | npm install -g hexo-cli |
- 初始化 Hexo 框架:
1 | hexo init Blog |
- 进入 Blog 文件夹:
1 | cd Blog |
- 安装依赖:
1 | npm install |
- 启动 Hexo 服务:
1 | hexo s |
Step3: 配置 Next 主题
- Github拉取Next主题:
1 | git clone https://github.com/iissnan/hexo-theme-next themes/next |
- 在根目录的
_config.yml文件中修改theme: next
Step4: 添加博客内容
- 将写好的 Markdown 放到
source\_posts目录 - 将相应的图片放到
source\images目录 - 启动 Hexo 服务
Step5: Next主题美化
选择Scheme
编辑主题配置文件 themes\next_config.yml ,确定喜爱的Scheme,我选择了Gemini
1 | # Schemes |
侧边栏显示当前浏览进度
打开 themes/next/_config.yml ,搜索关键字 scrollpercent ,把 false 改为 true
如果想把 top 按钮放在侧边栏,搜索关键字sidebar ,把 false 改为 true
侧边栏加入网易云音乐播放器插件
首先在网页搜索网易云音乐,选择音乐或者歌单,并生成外链: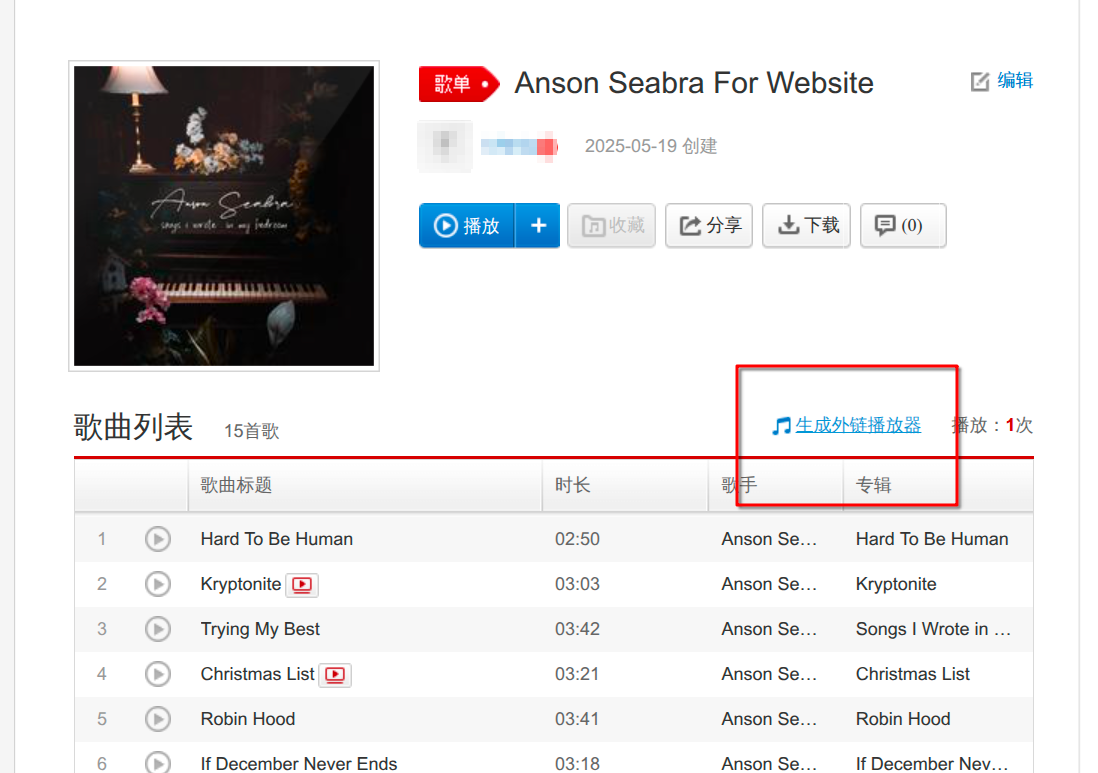
然后得到外链html代码:
将代码粘贴到一个合适的位置,建议放在侧边栏,在Blog/themes/next/layout/_macro/sidebar.swig文件下,选择位置复制进去,不同位置效果不同: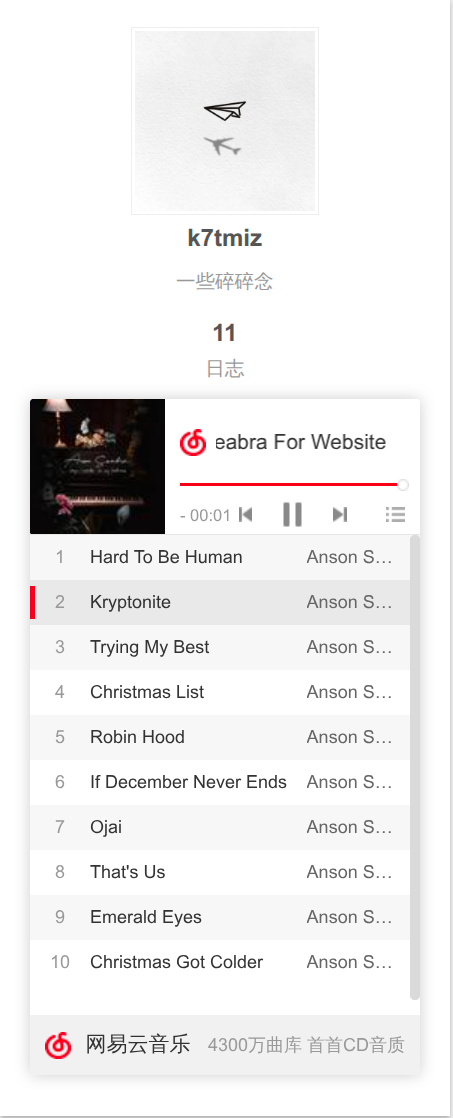
隐藏网页底部powered By Hexo / 强力驱动
打开 themes/next/layout/_partials/footer.swig ,使用注释隐藏之间的代码即可,或者直接删除。位置如下:
1 | <!-- |
设定菜单内容
编辑主题配置文件 themes\next_config.yml
1 | menu: |
按照上面的方式设置的菜单之后,点击标签,或者关于我都会出现错误页面,那这是怎么回事呢?
在默认情况,source 目录只有 _posts 一个文件夹的,并没有生成对应的 tags,about 等文件夹
生成下菜单文件夹的可以了: hexo new page tags
搜索功能
1 | npm install hexo-generator-search --安装插件,用于生成博客索引数据 |
修改博客配置文件(根目录/_config.yml),添加以下代码
1 | search: |
文章自动折叠功能
1 | npm install hexo-excerpt --save |
修改博客配置文件(根目录/_config.yml),添加以下代码
1 | excerpt: |
利用Hexo-abbrlink插件生成唯一文章链接
Hexo在生成博客文章链接时,默认是按照年、月、日、标题格式来生成的,可以在站点配置文件中指定new_post_name的值。默认是:year/:month/:day/:title这样的格式。如果你的标题是中文的话,你的URL链接就会包含中文。复制后的url路径就是把中文变成了一大堆字符串编码,如果你在其它地方用了你自己这篇文章的url链接,偶然你又修改了该文章的标题,那这个url链接岂不是失效了。
为了给每一篇文章来上一个属于自己的链接,可以利用hexo-abbrlink插件,来解决这个问题。
首先安装下hexo-abbrlink
1 | npm install hexo-abbrlink --save |
修改博客配置文件(根目录/_config.yml),添加以下代码
1 | permalink: post/:abbrlink.html |
日志的自动分类插件
1 | npm install hexo-auto-category --save |
修改博客配置文件(根目录/_config.yml),添加以下代码
1 | auto_category: |
给Hexo博客添加RSS订阅
1 | npm install hexo-generator-feed --save |
然后在 hexo 根目录下的 _config.yml 文件中添加配置
1 | # RSS订阅 |
在主题目录的 _config.yml 的menu目录添加
1 | RSS: /atom.xml || fa fa-rss |
Hexo插入图片并解决图片的路径问题
ref: Hexo插入图片并解决图片的路径问题
1 | npm install hexo-renderer-marked --save |
修改博客配置文件(根目录/_config.yml),修改添加以下代码
1 | post_asset_folder: true |
- post_asset_folder: true
执行hexo new post xxx时,会同时生成./source/_posts/xxx.md文件和./source/_posts/xxx目录,可以将该文章相关联的资源放置在该资源目录中。
- relative_link: false
不要将链接改为与根目录的相对地址。此为默认配置。
- prependRoot: true
将文章根路径添加到文章内的链接之前。此为默认配置。
- postAsset: true
在post_asset_folder设置为true的情况下,在根据prependRoot的设置在所有链接开头添加文章根路径之前,先将文章内资源的路径解析为相对于资源目录的路径。
举例说明:
执行hexo new post demo后,在demo文章的资源路径下存放了a.jpg和cover.jpg(用作封面),目录组织结构如下:
1 | ./source/_posts |
在demo.md的适当位置引用这两张图片,指定图片相对路径时需要假设当前目录为./source/_posts/demo/,而不是demo.md文件本身的所在目录。
图片语法:
Github仓库: hexo-renderer-marked
Hexo插入音视频等等
有图片,那怎么少得了音视频呢
安装插件:
1 | npm install hexo-tag-mmedia@1 --save |
别问为什么不用dplayer和apldayer,原因就是用不了,不兼容新版本
修改博客配置文件(根目录/_config.yml),修改添加以下代码
1 | mmedia: |
使用方法:
Aplayer:
1 | {% mmedia "aplayer" "name:songName" "url:a.mp3" %} |
Dplayer:
1 | {% mmedia "dplayer" "url:a.mp4" %} |
ref:hexo-tag-mmedia
一键回顶部
修改Next配置文件(themes/next/_config.yml),修改以下代码
1 | back2top: |
阅读进度条
修改Next配置文件(themes/next/_config.yml),修改以下代码
1 | reading_progress: |
作者头像设置
将我们的头像图片放置在 themes/next/source/images 目录下,然后修改 themes/next/_config.yml
1 | # Sidebar Avatar |
添加博客自定义图标
博客网站的图标可以在easyicon、bitbug、iconfont等网站选择和制作,然后选择或者创建相应大小的图标文件,放置在 themes/next/sources/images 目录下,然后修改 themes/next/_config.yml
1 | favicon: |
增加文章置顶功能
1 | npm uninstall hexo-generator-index --save |
然后在需要置顶的文章的Front-matter中加上top: true即可。比如下面这篇文章:
1 | --- |
到目前为止,置顶功能已经可以实现了。
不过置顶的文章显示在最上面之后,如果没有明确的置顶标志,是不是感觉有点怪怪的
设置置顶标志
打开: themes/next/layout/_macro 目录下的post.swig文件,定位到 <div class="post-meta">标签下,插入如下代码:
1 | {% if post.top %} |

ref: Hexo博客优化之彻底解决博文置顶问题
ref: Hexo博客置顶功能优化
定制Next主题的Sidebar_state
因为只有true和false 而我想定制在Hexo的NexT主题中仅显示侧边栏的archive部分并隐藏tags
修改Next配置文件 theme/next/layout/_partials/sidebar/site-overview.swig ,注释你想注释掉的,比如我注释掉了 categories 和 tags

Step6: 将生成的静态页面部署到 Github 上
- 具体操作:修改站点配置文件_config.yml的最后部分
1 | deploy: |
要先安装deploy-git,才能用命令部署到GitHub
1 | npm install hexo-deployer-git --save |
然后
1 | hexo clean #清除之前生成的东西 |
过一会儿就可以在 yourname.github.io 这个网站看到你的博客了
暂时也想不太起来还改了哪些内容,等想起来或者有扩充我再接着完善文档好吧
还有使用Git分支保存Hexo博客源码到Github有空再更… 2025.5.19日凌晨0:45分先立下Flag(doge)
其他参考的一些帖子
ref: 2024年,如何使用 github pages + Hexo + Next 搭建个人博客
ref: NexT主题美化
ref: Hexo博客优化之Next主题美化